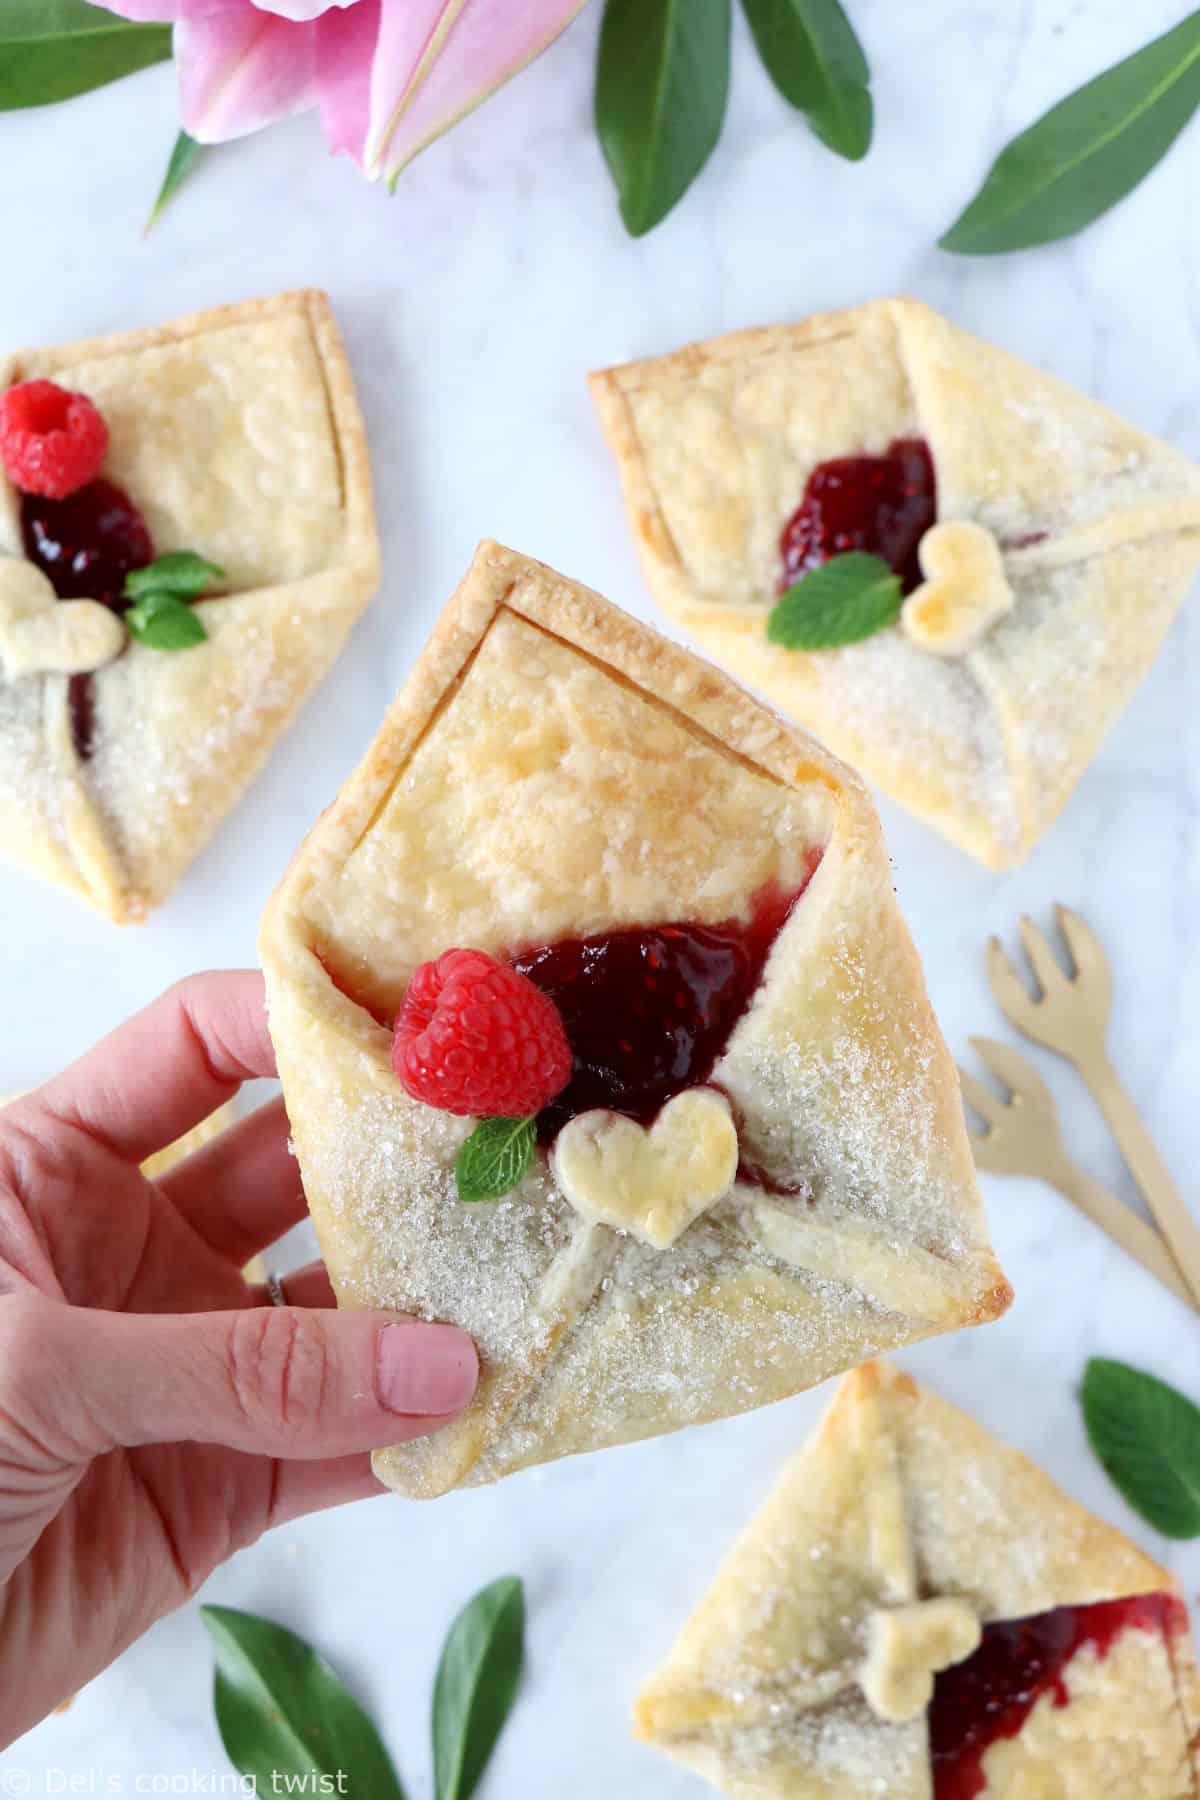
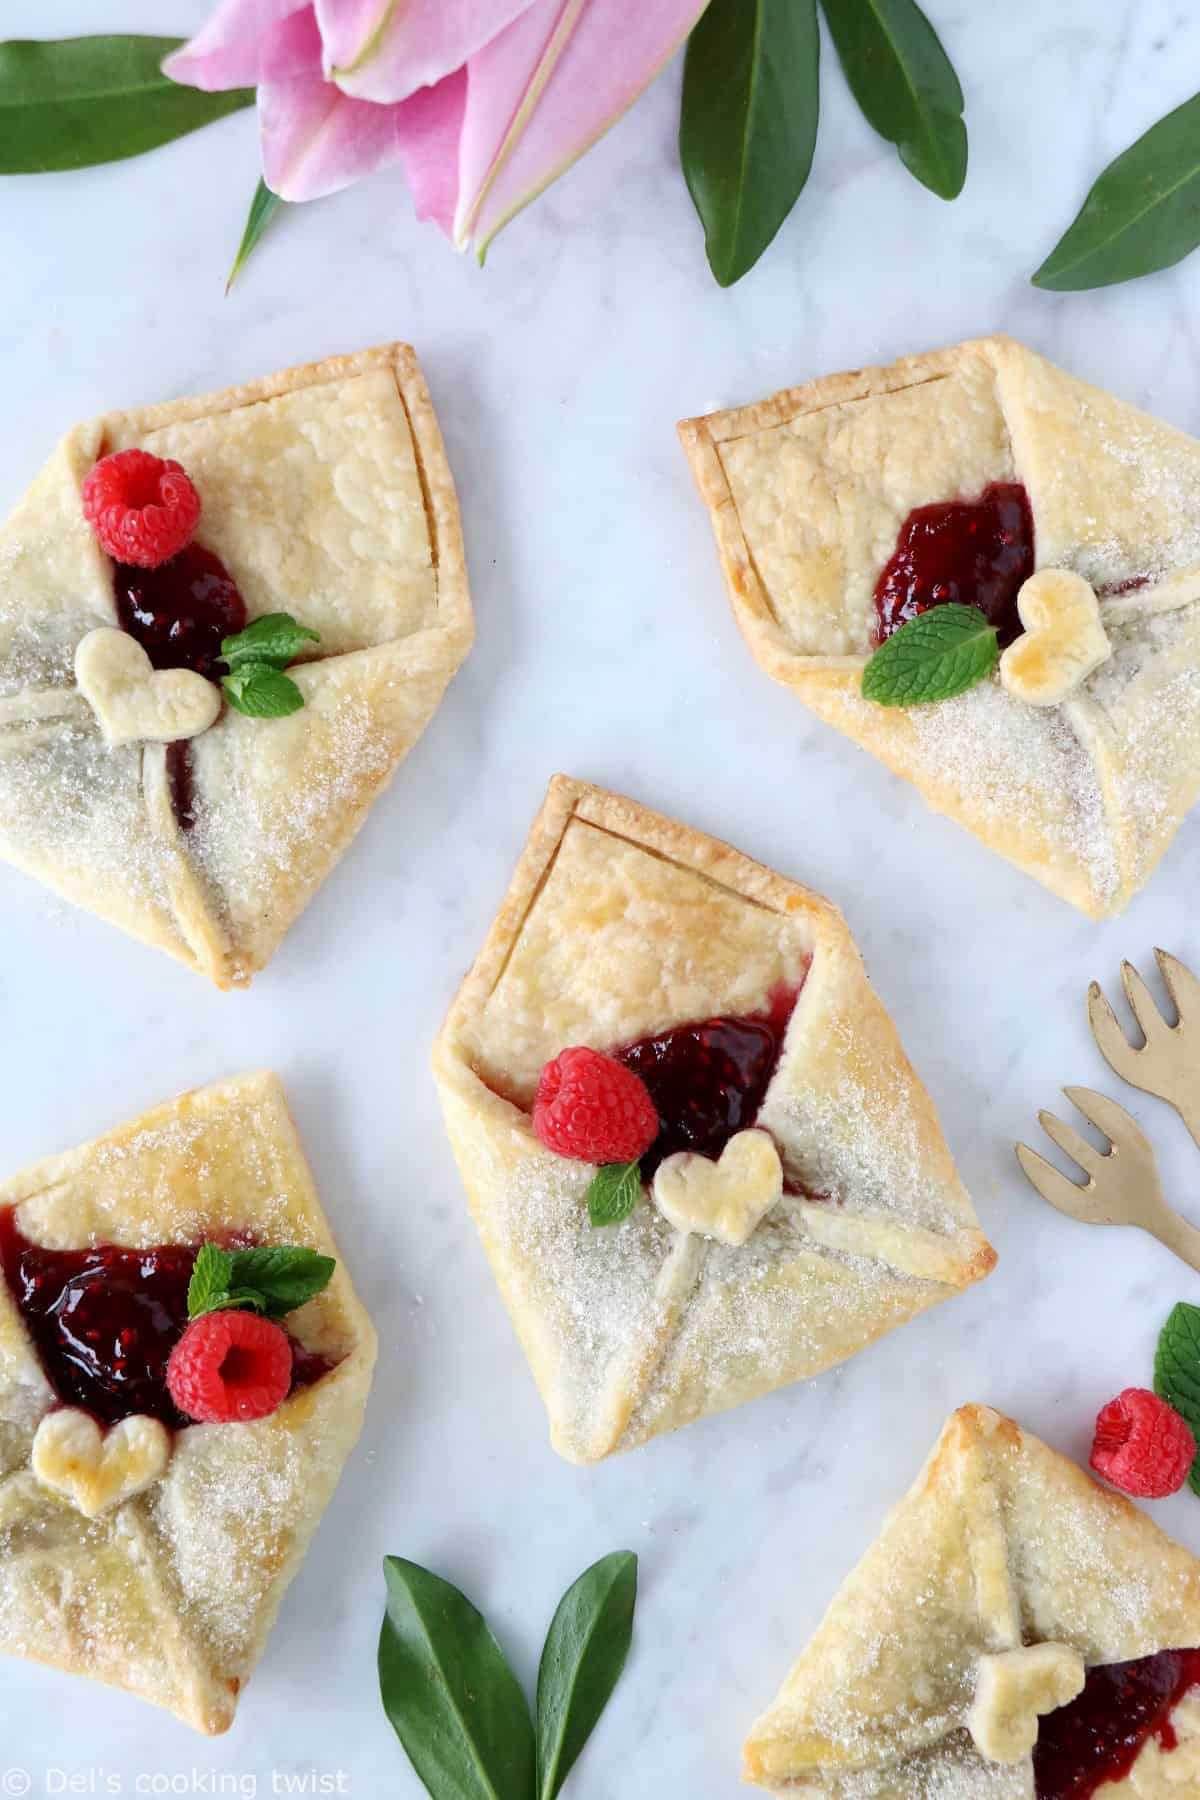
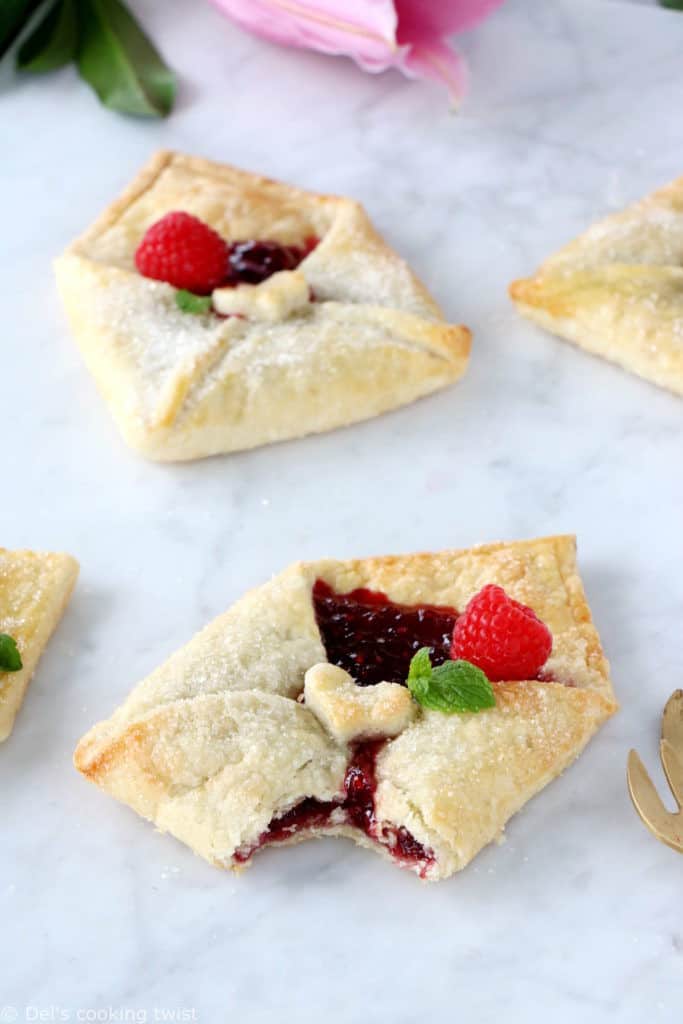
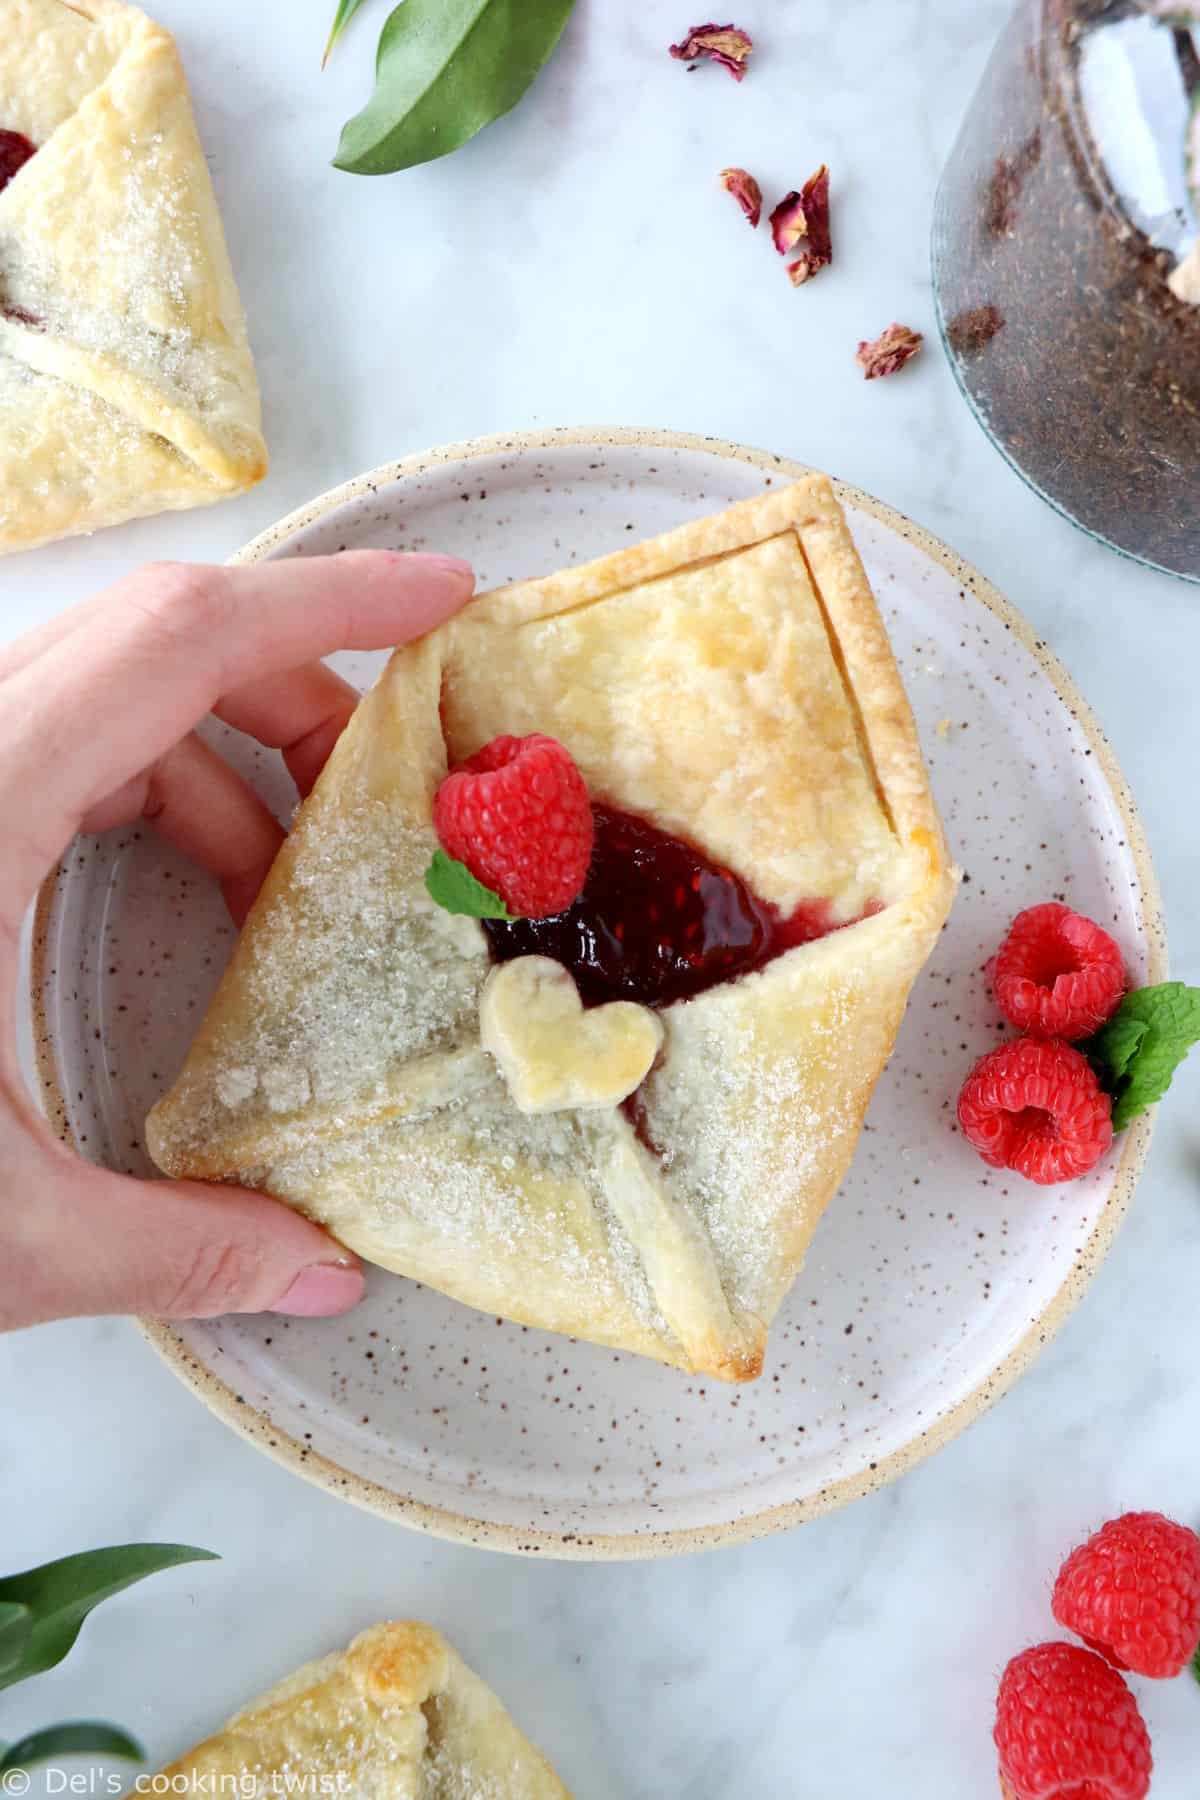
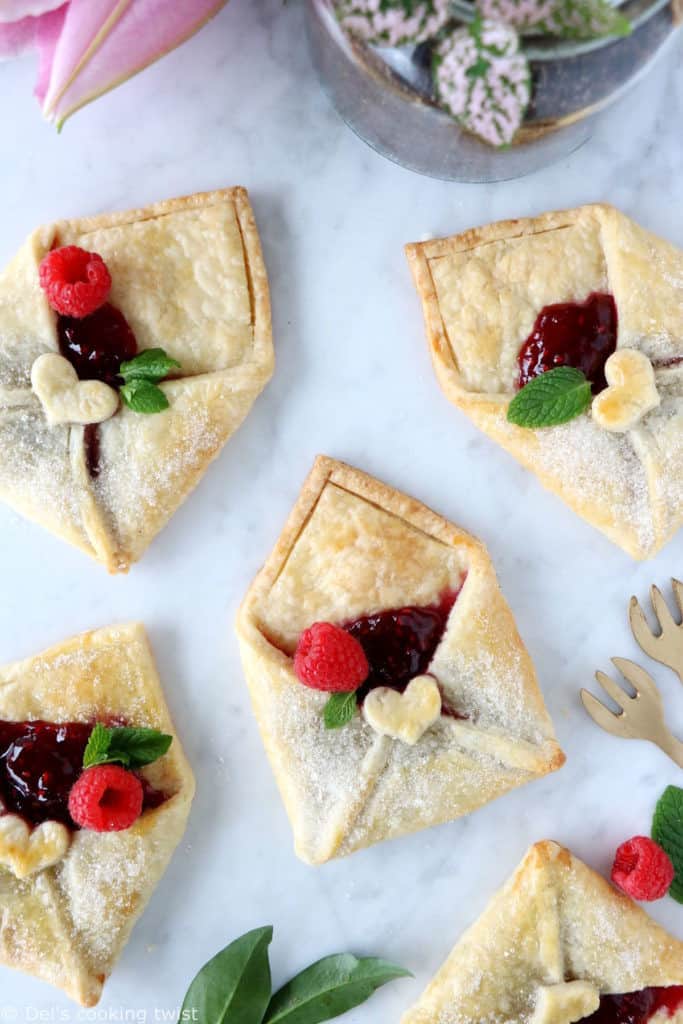
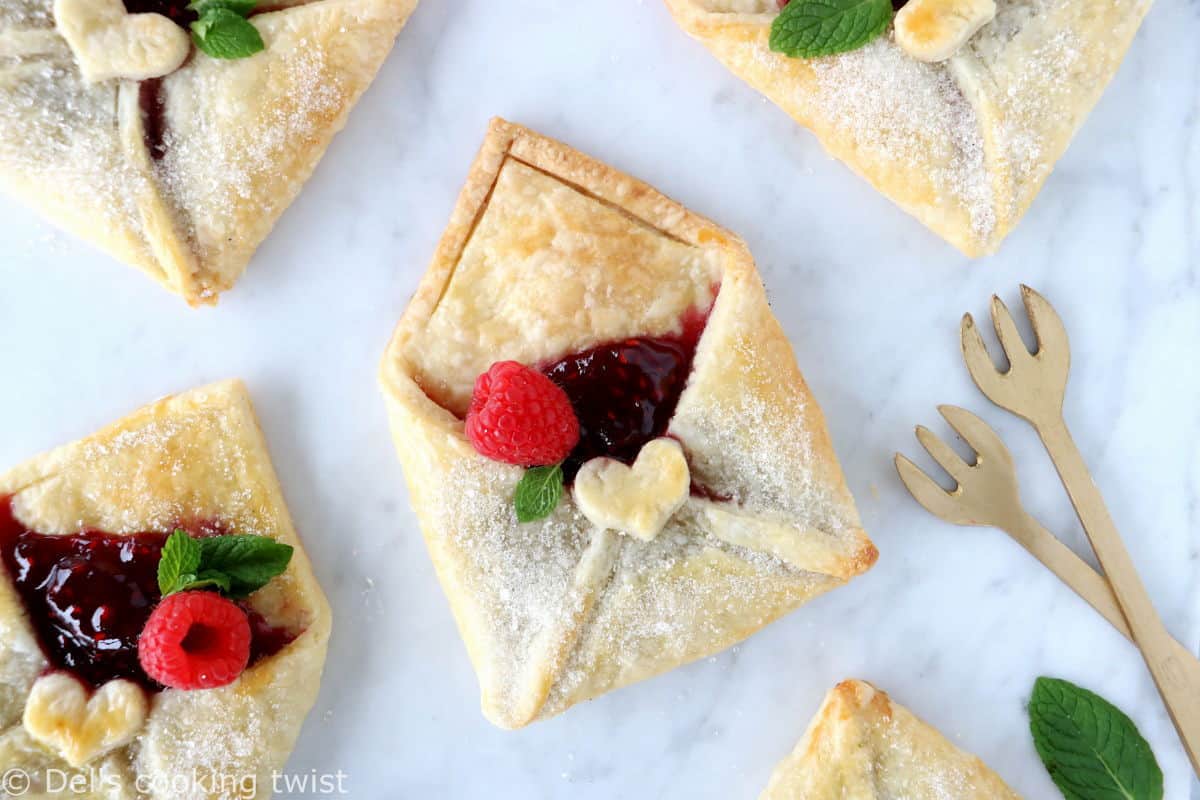
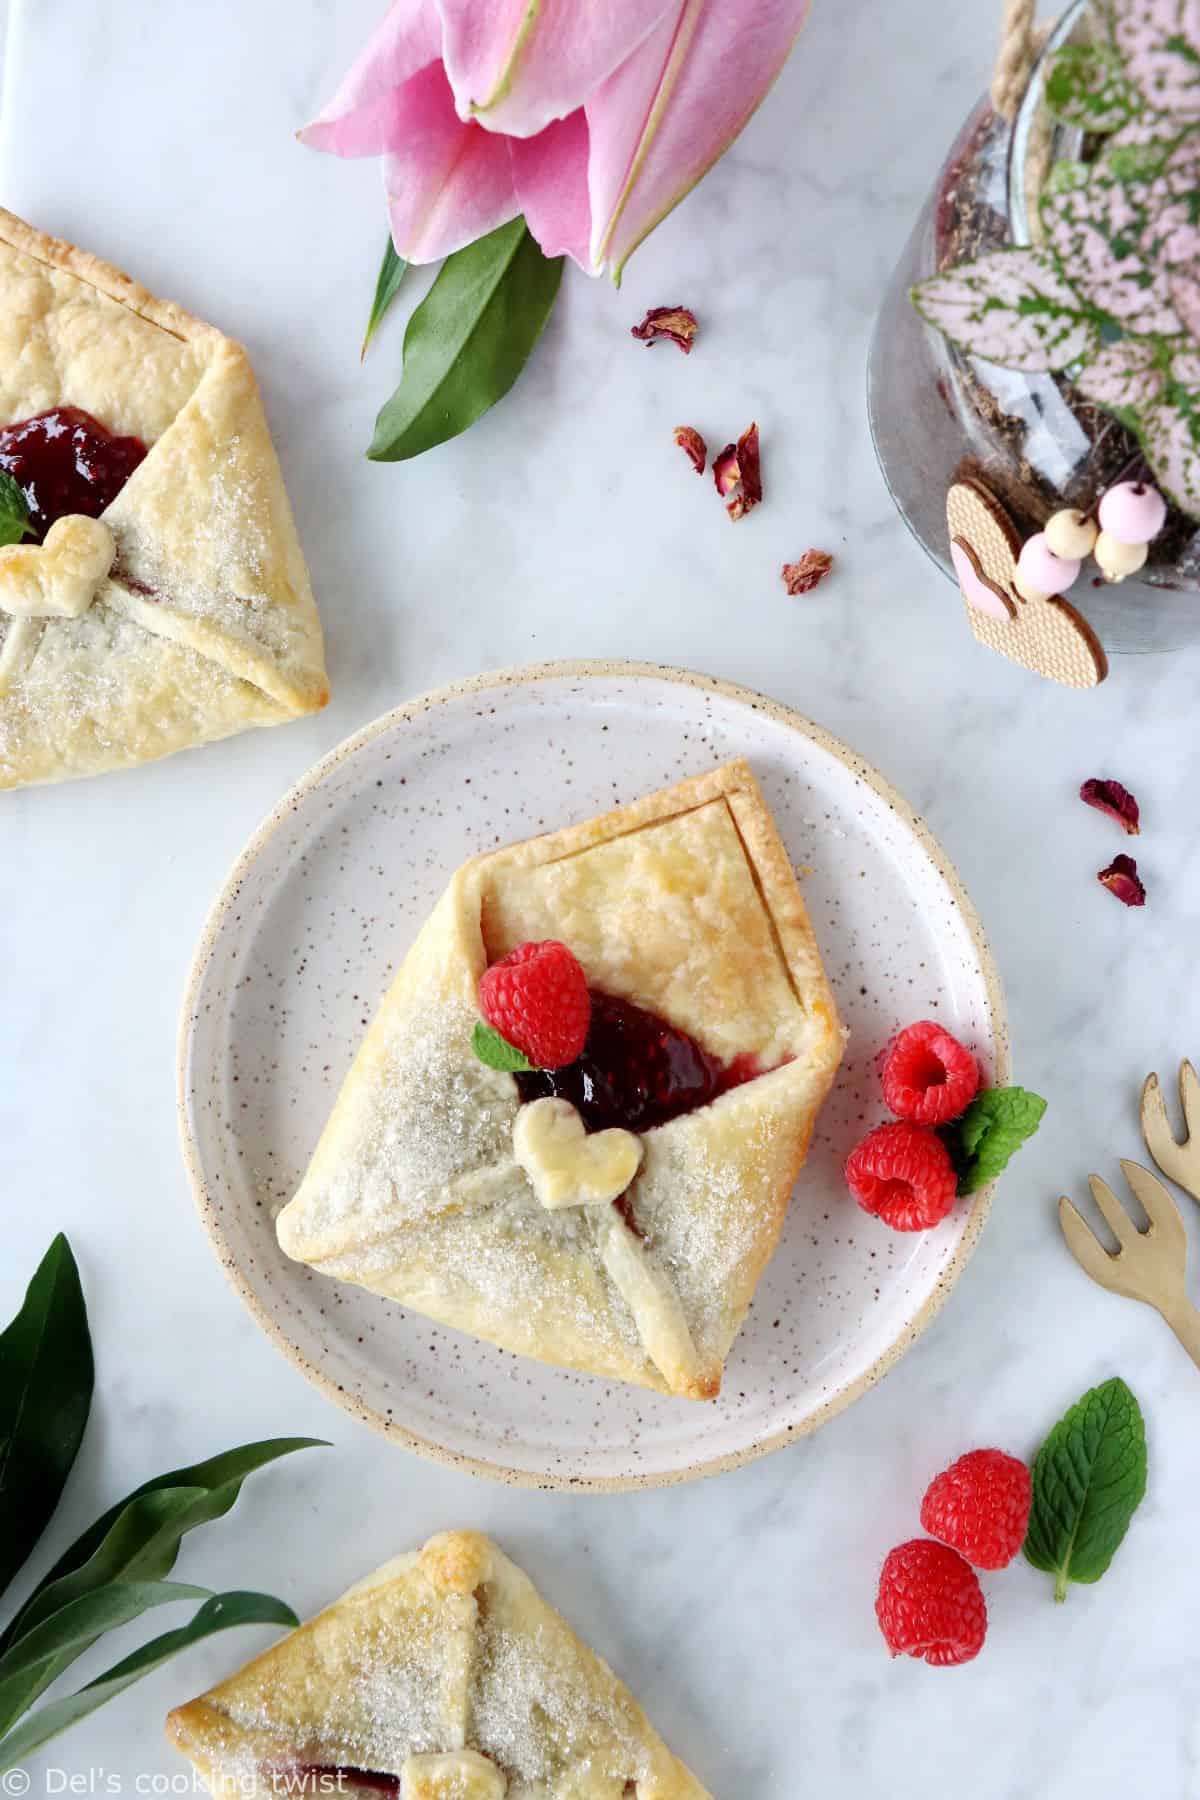
Make these adorable raspberry pie pastry envelopes for Valentine’s Day, Mother’s Day or for a tea party with friends. The mini hand pies are folded like an envelope, filled with a delicious raspberry jam, and sprinkled with sugar to make each bite sweet, crusty and irresistible. They’re also super fun and easy to make.
Email me this recipe
We’ll send it straight to your inbox, along with weekly food inspiration!
When you run out of inspiration to write a love letter, bake these lovely pastry envelopes instead! There’s nothing better than something homemade to say “I love you” to your dear ones, whether he or she is your Valentine, your mom, dad, or a friend you really care about. They also make perfect little edible presents for Thanksgiving!
Raspberry pie pastry envelopes
I’ve been willing to make these pie pastry envelopes forever. They randomly popped up on my Pinterest feed many years ago and I always kept the idea in mind… for later. Later, because they seemed a little advanced and intimidating. Well, I’ve got news for you: these little pastry envelopes are actually very fun to make and easy to assemble (involve little helpers in the house, they will love it).
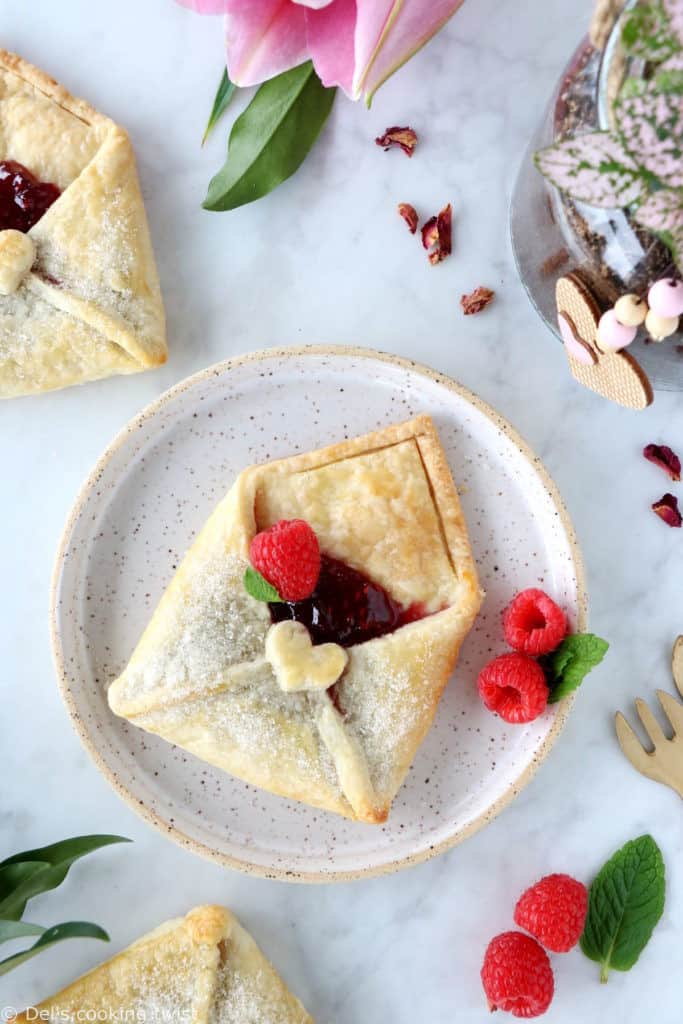
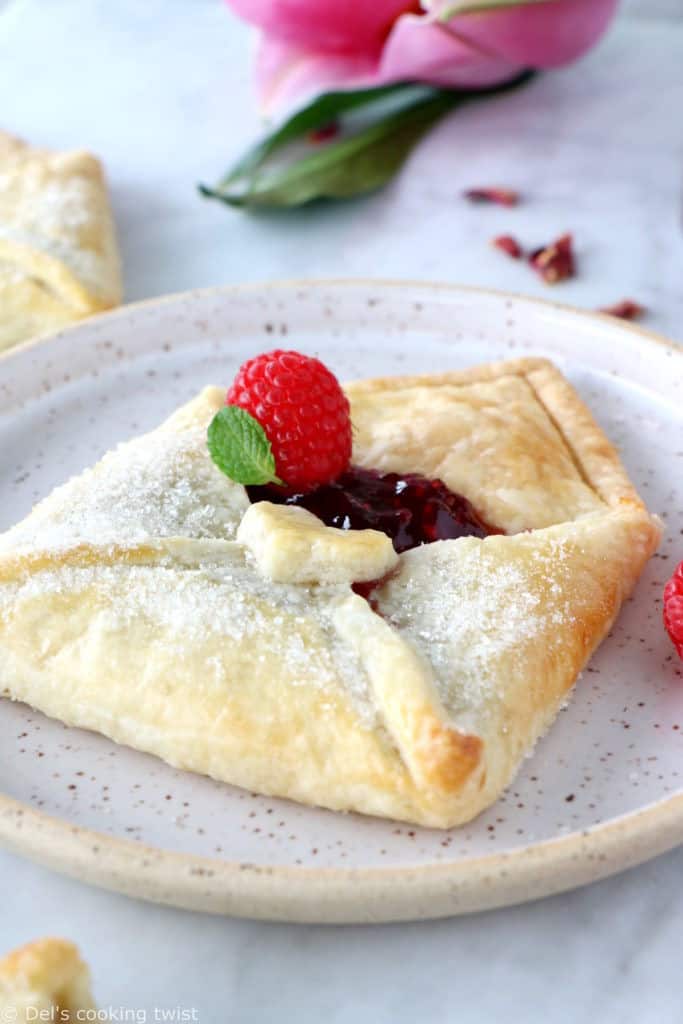
I created a super simple and quick version, using my favorite homemade pie crust (a recipe that never fails) and simply filled the inside with some raspberry jam. The result is sweet, crunchy, and simply irresistible. Add a few fresh berries for decoration, maybe a touch of mint, and serve with a side of whipped cream to your favorite tea party. Everyone will fall for these raspberry love notes!
How to assemble your love letters?
Don’t let you fool by the sophisticated look of these pie pastry envelopes, they’re actually very fun and easy to make. Follow my step-by-step guide below to learn how to fold them:
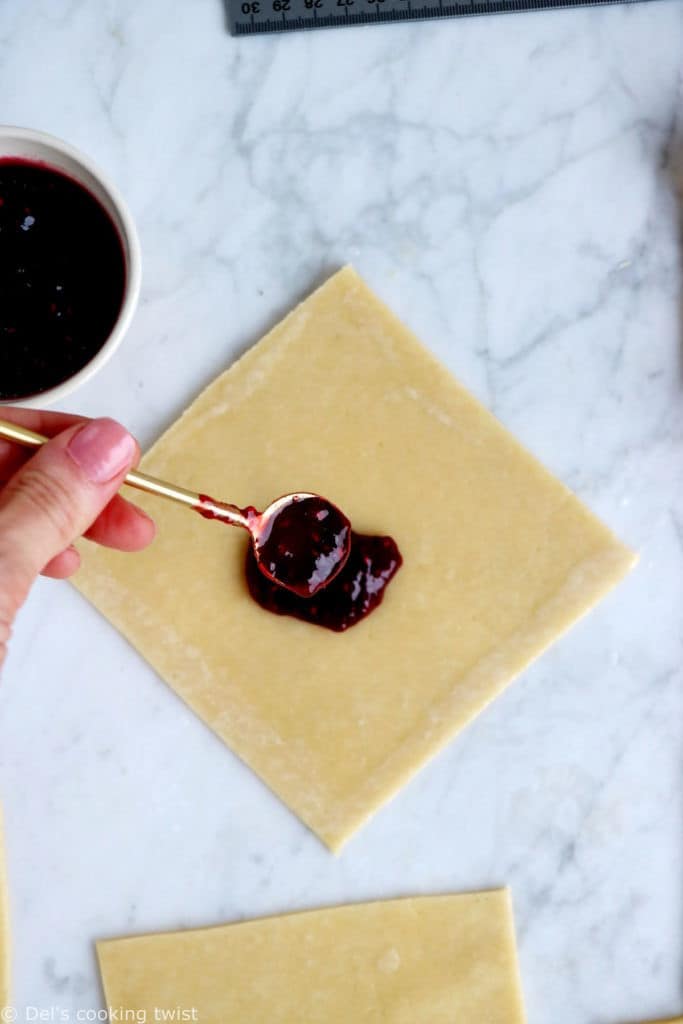
- Cut the dough into 5 envelopes of 5 ⅛ x 5 ⅛ inch (13 x 13 cm). Often, you will make 4 envelopes at once, then use the leftover crusts to create the fifth one and the small heart-shaped cookies.
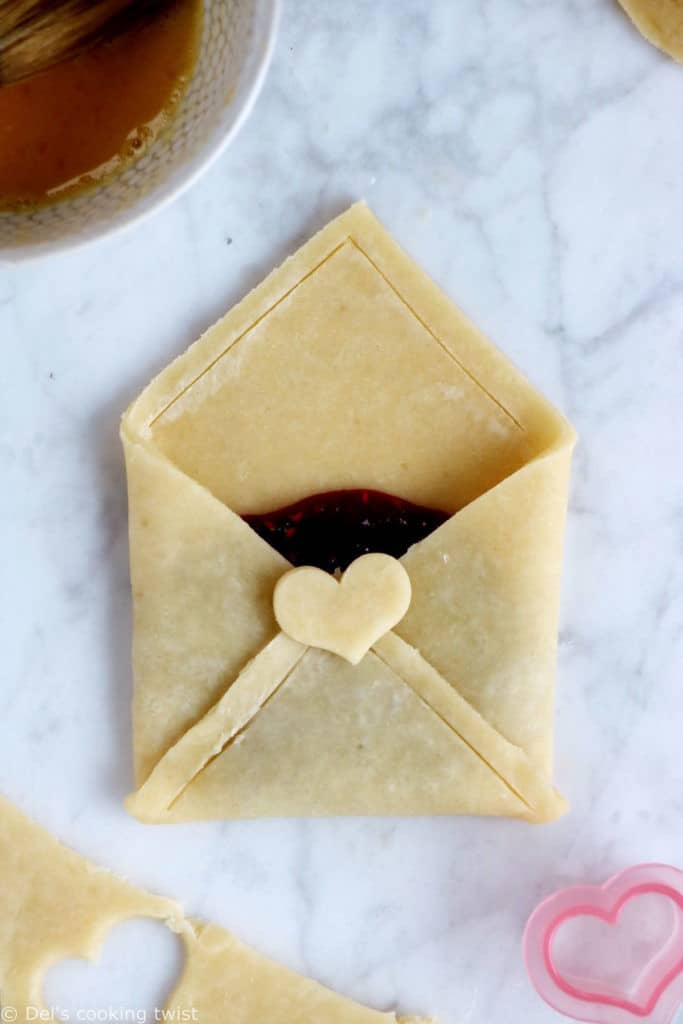
- Rotate the squares to resemble diamond shapes, and fill the center with the raspberry jam (do not overfill). Lightly brush the two bottom edges with water.
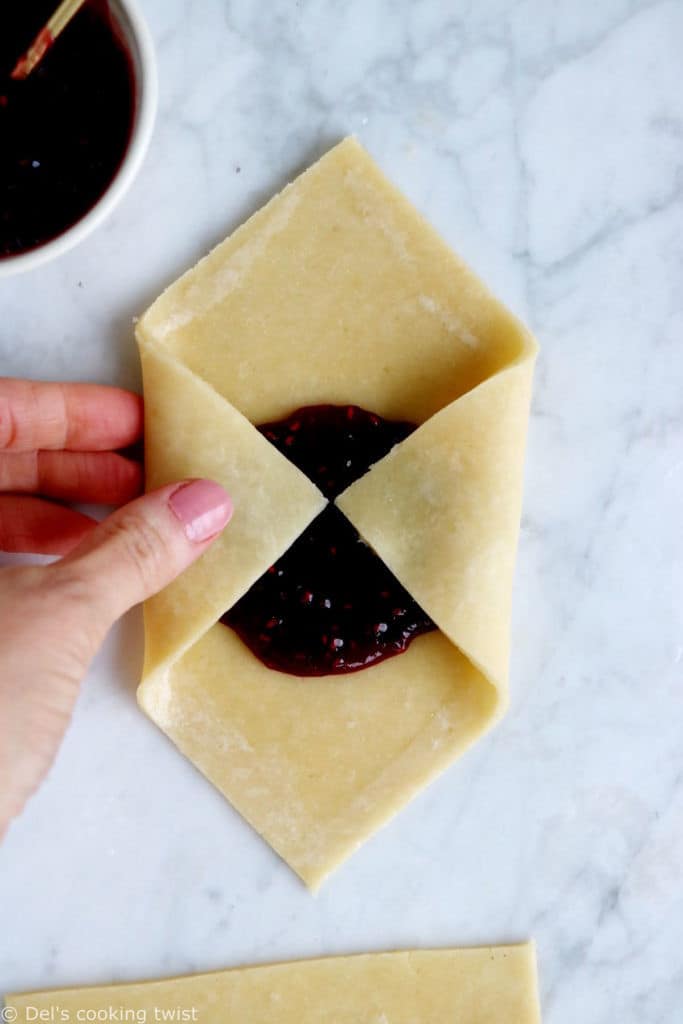
- Fold the left and right sides to the center, making them slightly overlap, then fold the bottom one on top of the previous ones. Leave the upper flap open.
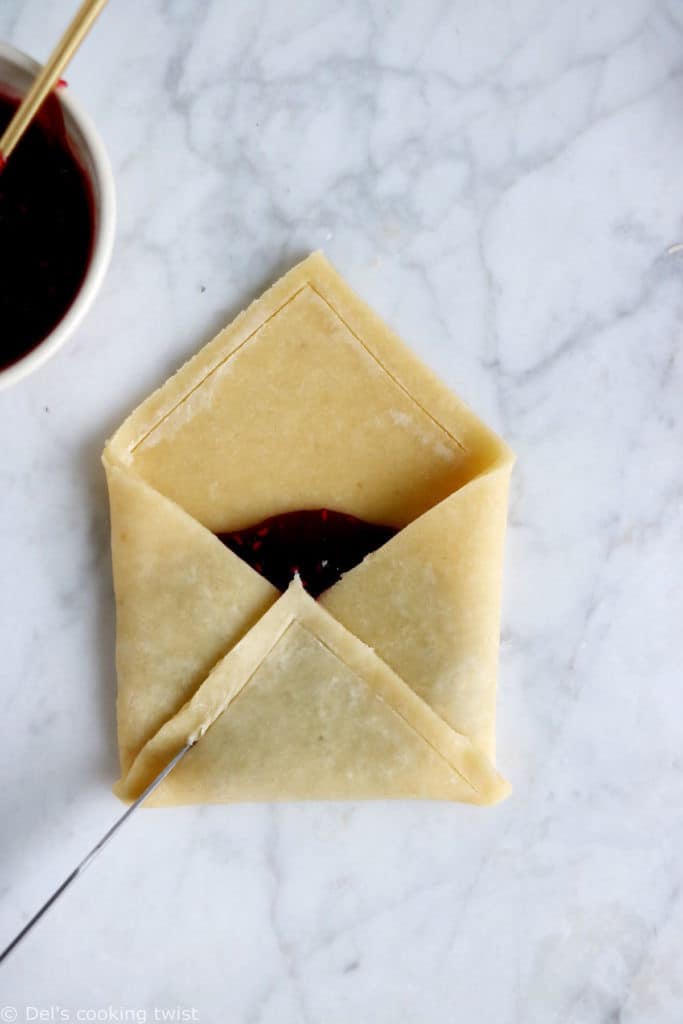
- Add the hearts to seal the envelopes, by applying a little water underneath to ensure they stick to the envelopes.
- If desired, you can lightly score around the lines with a sharp paring knife for extra decoration. Brush with beaten eggs, and bake!
Pro tips to make beautiful pie pastry envelopes
Because we all want pretty pie pastry envelopes, I gathered a few useful tips to ensure a great result every single time. I’m sure you’ll get the hang of it pretty soon!
- Always work with a cold pie crust. It’s important to chill the dough by placing it in the refrigerator for 30 minutes to 1 hour before using. If during the pie pastry envelope process (rolling out the dough, cutting it out into square, folding, etc.), the crust is warming up a little, pop it in the refrigerator again between steps to ensure you always work with a cold dough.
- Prefer homemade pie crust over store-bought. The crust is what’s the most important when it comes to hand pies, and therefore I strongly encourage you go the extra mile with a homemade pie crust. The result will be flakier, crispy and delicious.
- Do not overfill the envelopes and use a little water on the edge to help the sides stick together. You don’t need much filling for each pastry. If you overfill it, the raspberry jam will spill over the pastry while baking. To make sure your envelopes always look pretty, make the filling barely higher than the folded envelope bottom, and readjust by adding a little bit more after baking.
- Baking advice. While baking, the open side of the envelope usually turns golden brown a little faster than the over folded sides. Cover them with foil if needed.
Recipe variations
Once you master the love letter technique, you can play around with the recipe and use different fillings depending on the season, the occasion, and your personal preferences too.
- Use a homemade filling instead of jam. Follow the raspberry filling instructions here for a homemade version. You can then replace raspberries with other berries of choice.
- Make them apple pies or peach pie. Simply replace the raspberry jam with this apple pie filling or this peach pie filling.
- Garnish with fresh fruits (blueberries, blackberries, sliced strawberries, sliced bananas…). To do so, you can add a little foil packet (brushed with melted butter) in the center of each envelope before baking, as explained here. When the crust is baked, remove the foil, let cool, and garnish with fresh fruits.
More Valentine’s Day recipe you will love:
- Red Velvet Beetroot Cake with Vanilla Frosting
- Heart-Shaped Red Velvet Valentine Cakes
- Lemon Curd Cream Puffs
- Chocolate Mousse Raspberry Cake
- Homemade Profiteroles
- 3-Ingredient White Chocolate Mousse
- Molten Chocolate Lava Cake
Raspberry Pie Pastry Envelopes
- Prep Time: 2 hours
- Cook Time: 15 mins
- Total Time: 2 hours 15 minutes
- Yield: 5 envelopes 1x
- Category: Desserts
Make these adorable raspberry pie pastry envelopes for Valentine’s Day, Mother’s Day or for a tea party with friends. The mini hand pies are folded like an envelope, filled with a delicious raspberry jam, and sprinkled with sugar to make each bite sweet, crusty and irresistible.
Email me this recipe
We’ll send it straight to your inbox, along with weekly food inspiration!
Ingredients
- 1 ¾ cup (7.5 ounces/210g) all-purpose flour
- 1 pinch of salt
- ½ cup + 1 Tablespoon (5 ounces/140g) unsalted butter, diced
- 1 Tablespoon granulated sugar + extra for dusting
- ⅓ cup (75 ml) water, or more if needed
- 7 ½ teaspoons raspberry jam*
- 1 egg, beaten (for brushing)
Instructions
- In a medium-sized bowl, mix together the flour and salt. Dice the butter into small pieces and crumble it with the flour until lumps are the size of small peas. Add sugar and stir well. Pour in the ice cold water, little at a time, mixing with a fork. Finish by hand and shape into a ball. Flatten the dough a little bit, wrap into cling film and chill in the refrigerator for about 30 minutes.
- Remove the dough from the refrigerator and roll it out onto a floured surface. Using a ruler and a sharp paring knife, cut out the dough into 5 envelopes of 5 ⅛ x 5 ⅛ inch (13 x 13 cm). Use leftover pie crust to cut out 5 small hearts with a heart-shaped cookie cutter.
- Rotate the squares to resemble diamond shapes, and add 1 ½ teaspoons* of raspberry jam in the center (do not overfill) of each. Lightly brush the bottom edges of the diamond with water. Following the folds of a real envelope, close the left, right, and bottom flaps over the raspberry jam, leaving the upper flap open. Wet one side of the pastry heart and arrange wet side down onto the folded edges of the pastry envelope.
- Place pastries onto parchment paper-lined baking sheet. Brush with egg wash, and bake at 375°F (200°C) for about 15 minutes or until lightly browned. Brush the very hot pastries with water right out of the oven and sprinkle some sugar on top. Let cool onto the prepared baking sheet for 10 minutes, then transfer to a cooling rack. If desired, decorate with fresh raspberries, mint leaves, serve with a dollop of whipped cream, and enjoy!
Notes
* I find that 1 ½ teaspoons of jam is just enough. You do not need much filling for each pastry. If you overfill it, the filling will spill over the pastry and the presentation will not be pretty. Feel free to replace the raspberries with strawberry jam instead or any pie filling of choice.
Did you make this recipe?
Lastly, if you make this Raspberry Pie Pastry Envelopes, be sure to leave a comment and give this recipe a rating, letting me know how you liked it. And of course, don’t forget to tag me on Instagram! Thank you and enjoy!


Anya
These are spectacular! I tripled the batch and made enough for my valentines! And Del, you gave excellent instructions. Thank you so much.
Del’s Cooking Twist
Thank you so much for taking the time to leave a comment! I am so glad you liked them 🙂